Note: Click on thumbnails for expanded images!
Step 1 - Preparation:
I started by replacing the front shocks first, since that end was closer to the garage. The repair procedure starts just like many others. Engage the parking brake, or place blocks of wood around the tires. Loosen the front lug bolts, then jack up the front of the van. Place jack stands under the frame so that the van won't fall on top of you. Remove the lug bolts, pull off the front wheels and place them out of your way. Once all the prep work is done, it's time to get busy!
Step 2 - Remove The Upper Shock Mounting Nuts:
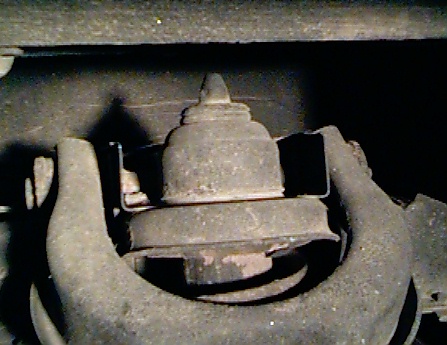 The shaft of the shock extends up through a mounting hole in the frame and is held in place with a nut
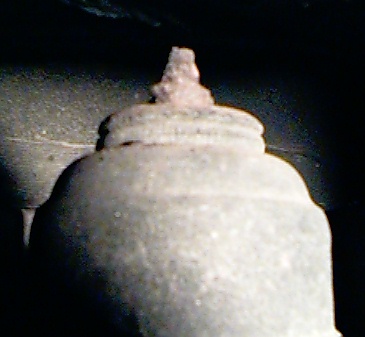 on the shaft's threaded end. A protective plastic cover, seen here to the left, is placed over the nut
to keep it from corroding. Use a screwdriver to pry the cover off the top. Once removed, you should be
able to see the nut that holds the shock in place. On the passenger side shock, the Canadian road
salt had gotten under the cover, and corroded the nut so badly that I could not use a wrench or even
vise-grips to get the nut loose. To get the shock off, I ended up using a reciprocating saw (Sawzall)
on the shaft's threaded end. A protective plastic cover, seen here to the left, is placed over the nut
to keep it from corroding. Use a screwdriver to pry the cover off the top. Once removed, you should be
able to see the nut that holds the shock in place. On the passenger side shock, the Canadian road
salt had gotten under the cover, and corroded the nut so badly that I could not use a wrench or even
vise-grips to get the nut loose. To get the shock off, I ended up using a reciprocating saw (Sawzall)
 with a 8" metal cutting blade and slicing through the rubber bushing just below the large washer.
As the blade went through the rubber, it made plenty of smoke! On the driver's side, life was much
easier. I was expecting to have to cut the top of this shock off as well, but was pleasantly suprised
to find that the installer had put grease all over the top mounting nut before installing the protective
cover. The result was that I was able to easily remove the top nut with a 15mm combination wrench.
with a 8" metal cutting blade and slicing through the rubber bushing just below the large washer.
As the blade went through the rubber, it made plenty of smoke! On the driver's side, life was much
easier. I was expecting to have to cut the top of this shock off as well, but was pleasantly suprised
to find that the installer had put grease all over the top mounting nut before installing the protective
cover. The result was that I was able to easily remove the top nut with a 15mm combination wrench.Step 3 - Remove The Lower Shock Mounting Nuts/Bolts:
 The bottom mounting point for the front shock is a bolt that passes through the lower control arm.
I was not able to get the 23mm nut off at first, so I squirted some penetrating oil on the nut and heated
it with a propane torch. I'm not sure if this is normal, or another result of my Crew having spent
it's first 13 years in Canada. After about a minute of heating, I was able to remove the nut with
no damage to any of the threads.
The bottom mounting point for the front shock is a bolt that passes through the lower control arm.
I was not able to get the 23mm nut off at first, so I squirted some penetrating oil on the nut and heated
it with a propane torch. I'm not sure if this is normal, or another result of my Crew having spent
it's first 13 years in Canada. After about a minute of heating, I was able to remove the nut with
no damage to any of the threads.Step 4 - Transfer Rock/Dust Shields:
The rock shield is held captive by a small metal sleeve that slides over the shaft of the shock absorber. I had to use a hacksaw and chisel to remove it from the corroded shock, while it simply slid off the other shock. Learn from this-Be sure to grease those sleeves when you do the install! The sleeve is only about $3.00 at the dealer, but they had to special order (of course) it. Once the sleeve is off, the rock shield slides off as well.

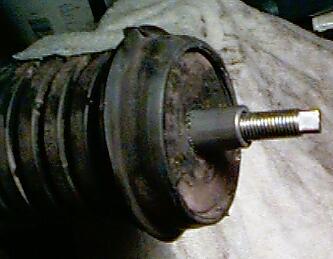 Re-assembly is pretty easy. First, slide the dust shield down the shaft, as seen to the left. It can only go so far due
to the stepped-down shape of the shaft (see picture above). Then slide the metal sleeve down to retain the rock shield,
as seen to the right. You did remember to grease the sleeve before installing, right?
Re-assembly is pretty easy. First, slide the dust shield down the shaft, as seen to the left. It can only go so far due
to the stepped-down shape of the shaft (see picture above). Then slide the metal sleeve down to retain the rock shield,
as seen to the right. You did remember to grease the sleeve before installing, right?Step 5 - Installation:
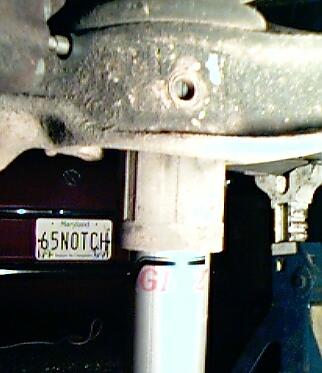 To install the shocks, get back under the front of the van and slide the shock up through the hole
in the lower control arm, as seen here on the left. If the shock is too long to make the angle into
the lower control arm, manually compress the shock fully and then quickly stick it up the hole before
it expands. You will be able to do it...these are low pressure gas shocks, so they expand slowly.
Another alternative is to raise the van even higher in the air. I went for the "compress and stuff"
method myself. I was doing the work at night to avoid the heat, and you can see where the light
caught the front license plate of one of my other toys. :)
To install the shocks, get back under the front of the van and slide the shock up through the hole
in the lower control arm, as seen here on the left. If the shock is too long to make the angle into
the lower control arm, manually compress the shock fully and then quickly stick it up the hole before
it expands. You will be able to do it...these are low pressure gas shocks, so they expand slowly.
Another alternative is to raise the van even higher in the air. I went for the "compress and stuff"
method myself. I was doing the work at night to avoid the heat, and you can see where the light
caught the front license plate of one of my other toys. :)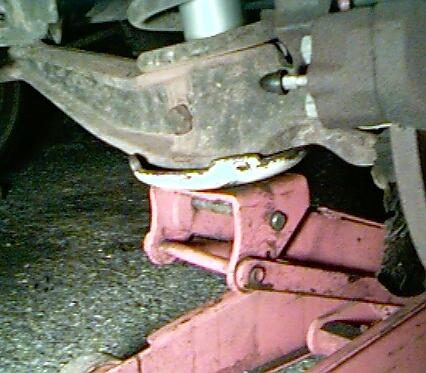 Once you have the shock inside the lower control arm, re-install the lower mounting bolt and nut.
The nut gets torqued to xx ft-lbs. With the lower mount secure, place a floor jack under the lower
control arm.
Once you have the shock inside the lower control arm, re-install the lower mounting bolt and nut.
The nut gets torqued to xx ft-lbs. With the lower mount secure, place a floor jack under the lower
control arm.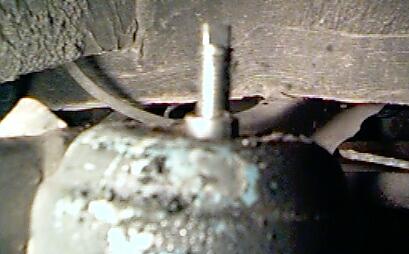 Slowly jack up the lower control arm to slightly compress the spring. Keep jacking until you see both
the shaft and sleeve of the shock sticking up through the upper mount, as seen on the left.
Slowly jack up the lower control arm to slightly compress the spring. Keep jacking until you see both
the shaft and sleeve of the shock sticking up through the upper mount, as seen on the left. Place the supplied rubber bushing over the shaft, followed by the washer. Next comes the nut to
secure the top of the shock. I normally tighten the nut until the rubber bushing is compressed to
just over the diameter of the washer that retains it. In this case, the nut bottomed out just as I
was about to stop turning. Gotta love that! Smear some grease on the nut and stud, and re-install
those plastic protective caps.
Place the supplied rubber bushing over the shaft, followed by the washer. Next comes the nut to
secure the top of the shock. I normally tighten the nut until the rubber bushing is compressed to
just over the diameter of the washer that retains it. In this case, the nut bottomed out just as I
was about to stop turning. Gotta love that! Smear some grease on the nut and stud, and re-install
those plastic protective caps.Step 6 - Test Drive:
With the new shocks mounted, re-install the front wheels and re-torque the lug bolts. Then take that test drive. At first, I installed only the front shocks due to time contraints. My impressions immediately after the install:
The ride is slightly harsher. I wasn't really interested in obtaining a firmer ride, and now I can really feel bumps in the seat of my pants. I'm wondering if the KYB was the right choice, or if I should have gotten the Boge shocks. I have crossed those coin-spilling intersections several times now, and I am amazed at the difference. The suspension no longer "unloads" like before, which makes crossing *much nicer*. That stretch of road near my home that used to make the Crew oscillate so much has been tamed...very nice.
After 2 weeks of driving on the new front and old rear shocks, I am satisfied with the results. I must have already become accustomed to the firmer ride, since I don't notice the bumps like just after I first installed the new fronts. I hope to get the rear shocks installed within the next 2 weeks, so stay tuned!
Home
Please stop back soon!
Tom Carrington