More headaches!
August 30- September 30, 1998: I took the entire month of September off from one of my jobs, partly to use the extra time to finish the conversion project.
One of the things that bothered me was that the starter motor cranked over really slow. When the diesel engine was still in the Van, it cranked just fine. I checked and cleaned the connections, but that was no help. Then I realized that when I tried to turn the engine by hand, it was very difficult. After messing around with the engine, and even putting 24v DC across the starter in hopes that faster cranking would "free" the engine up, I called in for the reserves - Dad came over to visit. His suggestion was to loosen the bolts holding the engine and transmission together. Turns out the old guy was on to something! When I loosened the bolts, the engine was *much* easier to turn over by hand. The starter motor now spun the motor over easily. Something in the bell-housing of the tranny was binding! While happy to know why the engine was hard to crank, I was not overjoyed at the prospect of pulling the engine out again!
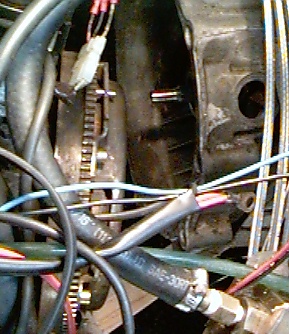
 The very next day, I got the engine hoist back out and started pulling the engine. I wasn't sure what I would find as the problem, and I was hoping for something easy. I lowered the engine slightly, and separated the engine from the trans. It didn't take me too long to find the culprit. Turns out the transmission input shaft (seen in the center of the photo to the right) was bottoming out in the rear of the crankshaft, causing the engine to bind.
  I was suprised, as I had taken the time to swap the input shaft from the diesel to the gas transmission. Oh well, so much for well-laid plans! I was able to sneak my grinder in between the engine and trans, and less then 10 seconds worth of grinding took off enough (less than .125") material from the end of the shaft to remove the interference. When I tightened the engine mounting bolts down this time, the engine still turned easily. One big problem solved!
 I have had several E-mails asking how much cutting I needed to do in order for the intake manifold to fit. While the engine was lowered down, I snapped another photo. Hopefully, the tape measure will put it in perspective. Remember, I'm American and those numbers are in inches!
With the engine back in,  I hooked up all the electronics and fuel injection components. Gasoline was supplied by a portable fuel tank. A quick hit of the starter, and the engine started right up! I've been waiting for nearly 2 years to hear that sound. I let the engine run a few minutes, and then shut it down. Since all the fuel injection and ignition parts were hanging out the back of the van, I still couldn't drive it around. But I sure was getting closer!
With the engine up and running, I turned my attention to getting all the electrical and fuel
injection components permanently mounted in the engine compartment. The big issue to me was
where to mount the combination fuel distributor/air intake box. Others that have done this
conversion have moved their battery up to under the passenger seat like in the
"normal" Vanagons, but my goal was to leave the battery in the stock location.
 There is a nice open area just forward of the driver's side tail lights, and I decided to put the air intake box in there. The stock air intake box from the donor Golf had no chance of fitting, so I decided to make my own. I started by buying a rectangular "low clearance" exhaust vent for a regular clothes dryer from my local Home Depot. Pictured on the left, this was the starting point for my airbox.
 I removed the air flow sensor assembly from the air intake box, and traced its outline onto the dryer duct. Using tin snips, I cut out the metal outline and drilled holes for the 6 mounting bolts.
With the fuel distributor mounted onto the modified dryer vent, I squeezed the entire assembly into that small area in  front of the driver's side tail light. A tight fit, but it made it! I mounted the ignition module and other related electronics in the open area in front of the passenger side tail light. What is nice about this setup is that most of the additional accessories are hidden from view.
Here's a few views of the nearly completed project.  I secured all the wires, and used plastic wire covers to give the wire harness a cleaner look. Here's one view of the engine. notice how the battery was retained in it's stock location.
 From this view, you can see how the air intake box is tucked down and out of the way, with the large black hose leading to the throttle body. The custom-made, stainless steel braided fuel lines from Troutman are visible here as well. I think this is a clean looking setup. I don't know why VW didn't offer this engine option for the USA market Vanagons!
This engine conversion project is getting close to being done. I still need to hook up the throttle cable, finish the fuel system and track down a few electrical gremlins. Unfortunately, the project is on hold again while I get our house fixed up to hopefully sell in the Spring of 1999. I'll get back to finishing up then. Besides, now I have my Crew Cab Vanagon to play with!
Look for another update in 1999!
Back to Page 3 of the Vanagon diesel to Golf/Jetta 4-cyl conversion

Back to Engine Conversions
Home
Please stop back soon!
Tom Carrington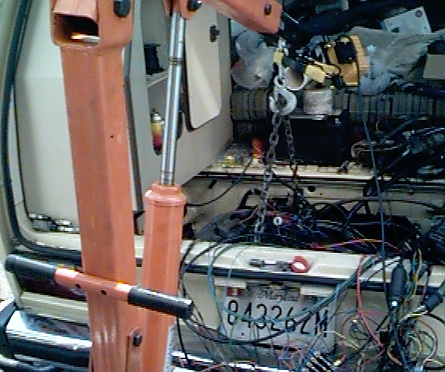
 I was suprised, as I had taken the time to swap the input shaft from the diesel to the gas transmission. Oh well, so much for well-laid plans! I was able to sneak my grinder in between the engine and trans, and less then 10 seconds worth of grinding took off enough (less than .125") material from the end of the shaft to remove the interference. When I tightened the engine mounting bolts down this time, the engine still turned easily. One big problem solved!
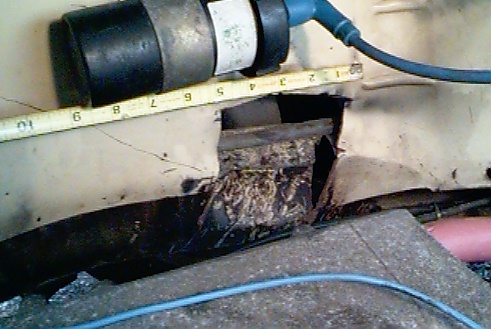 I have had several E-mails asking how much cutting I needed to do in order for the intake manifold to fit. While the engine was lowered down, I snapped another photo. Hopefully, the tape measure will put it in perspective. Remember, I'm American and those numbers are in inches!
 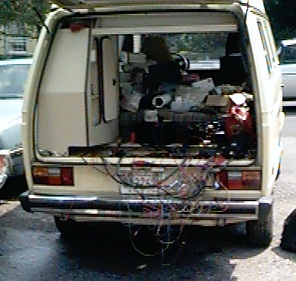 I hooked up all the electronics and fuel injection components. Gasoline was supplied by a portable fuel tank. A quick hit of the starter, and the engine started right up! I've been waiting for nearly 2 years to hear that sound. I let the engine run a few minutes, and then shut it down. Since all the fuel injection and ignition parts were hanging out the back of the van, I still couldn't drive it around. But I sure was getting closer!
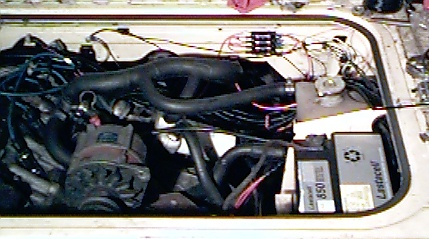 I secured all the wires, and used plastic wire covers to give the wire harness a cleaner look. Here's one view of the engine. notice how the battery was retained in it's stock location.
 From this view, you can see how the air intake box is tucked down and out of the way, with the large black hose leading to the throttle body. The custom-made, stainless steel braided fuel lines from Troutman are visible here as well. I think this is a clean looking setup. I don't know why VW didn't offer this engine option for the USA market Vanagons!